I always have fun creating vector portraits of people I know. It makes it more challenging to get the 'likeness' and their personality to show through. This time, I chose to do a vector portrait of my cousin, Natasha. Now, there are oh so many ways and techniques to create vector portraits but this one is modeled off of another tutorial at
PSDTuts+ . Many of the steps are taken from this tutorial and I have deleted or added information relevant to my piece.
Step 1
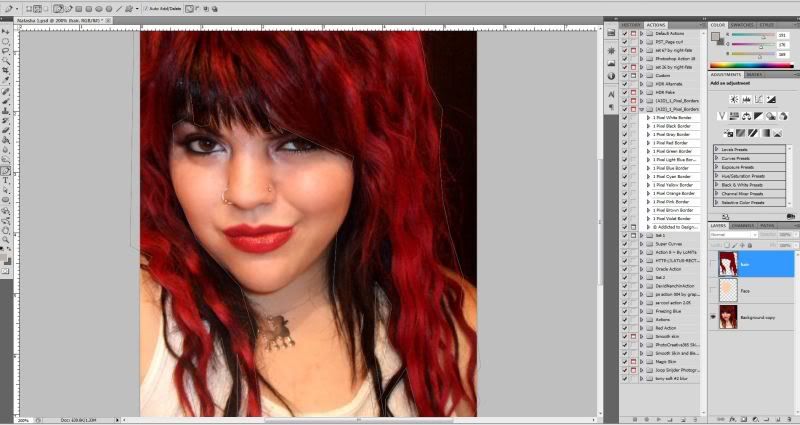
Before we start we need to find our inspiration. For this tutorial, I used a photograph of my cousin and opened it in Photoshop. Also, one big mistake that I accidentally overlooked, if you're making the vector portrait in Photoshop - set the resolution to 300 pixels. I left mine at 72 which means that I cannot enlarge it much without it looking pixelated. Alternatively, you could just create the vector portrait in Illustrator and avoid this mess altogether. Personally, I like making them in both.
 Step 2
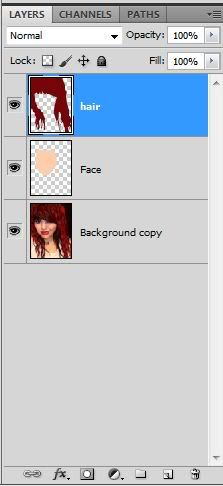
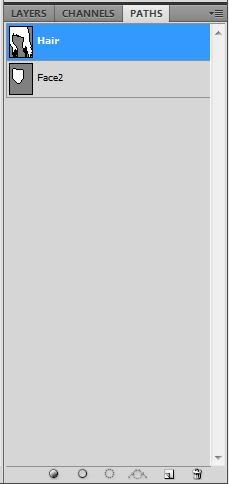
You will be using many layers to create this artwork, so try to keep everything organized. Create a new layer over the image and name it "Head." Then grab your Pen Tool (P), and make sure it is set to Paths.
 Step 3
Hold Ctrl + Space to select your Zoom Tool. Then zoom into the face. Trace the outline of her face. Do the same thing and trace the outline of her face, body and t-shirt. Use the eyedropper tool to select a colors for each of these elements.
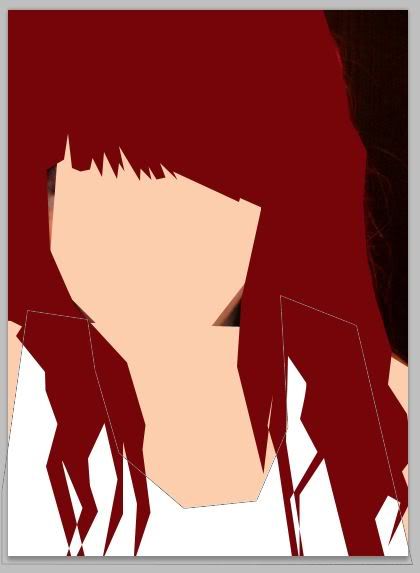
Also, be sure to create layers and groups to keep organized. Important: Make sure you are working on the corresponding paths and layers. If you are working on the Hair Layer - make sure the the Hair Path is selected, too.
 Step 4
Now a tricky part, the Eyes. Maybe you would like to create a Layer Set only for the eyes, since we are going to use many layers. Create a new layer called "Eye." Then Zoom in and draw the shape around both eyes. Then fill it with white. Create a new layer, and name it "Iris." Draw the path around the iris and fill it with black. Create a new layer, and name it "Eyeliner." Draw the path around her eyelash to contour the eyeball. Fill it with black. Use the Eraser Tool to erase all the white areas that surpass the Eyelash/Eyeliner area. You can make the eyeliner and the eyelashes together, but I chose to do them separately and made another layer and path for each of them. Create a new layer, and name it "Retina." Draw the path around the retina and fill it black.
Create a new layer, and name it "Highlights." To give the eye a little more life, select the highlights on the iris and fill them with white.
Note: The highlights are shown in the next screenshot after I added some shadow and highlights.
It should start to look something like this now:
 Step 5
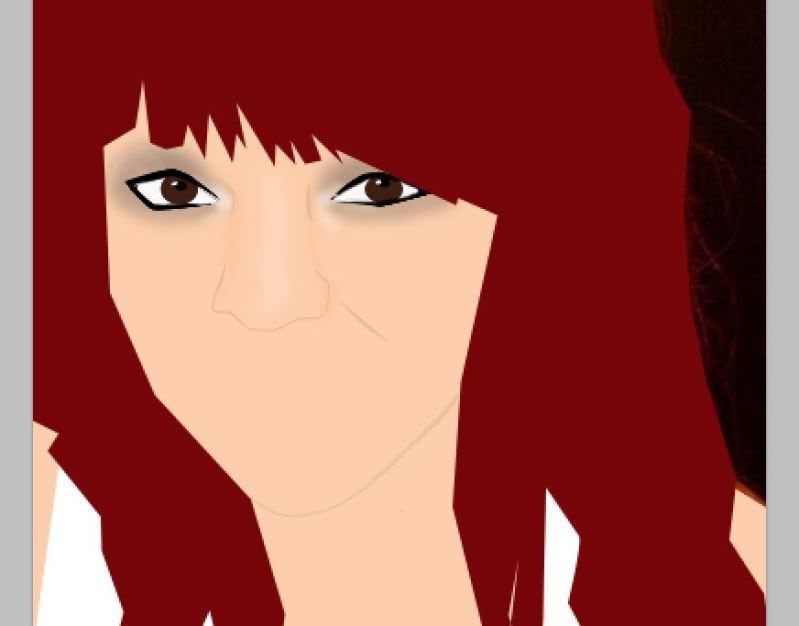
Now we will give the eyes a little depth. Select the "Head" layer. Draw paths around the eyes. Right-click the path and choose Convert Path To Selection. Grab the Burn Tool (0) and set the Exposure to around 25%. Darken those areas trying to follow the picture’s intensity. Feel free to play around with the Dodge and Burn tool and their parameters such as "Shadows, Highlights and Midtones" from the drop down menu and also the opacity. Try different combinations and see which works well with your portrait.
At this point, I have also added some outlines for the nose and smile lines and then used the dodge and burn tools to add some shadow and highlights to give the portrait some depth. Similar steps to creating depth and makeup for the eyes.
 Step 6
Go back to the "Eye" Layer and create a layer called "Eyebrows" above it. Create a path around the eyebrows and fill it with a color picked with the eyedropper tool (I).
Step 7
Create a new layer at the top and name it "Mouth." Then draw a path around her mouth and fill it with a color chosen by, YES, the eyedropper tool again (I). A very handy, time-saving tool. Draw the contour around the darker area in the middle of her mouth. Right-click to make it a selection, then open curves (Command + M) and darken it a little. To finish it use the Burn Tool to darken shadow areas around her mouth in both the "Head" and "Mouth" layers. I also used the "stroke" effect to create a lip liner. I just selected the same shade as lips and moved it on the color pallet a bit for a little contrast.
Step 8
With the Burn Tool still selected, select the "Body" layer and darken the shadow areas in her neck. Just compare the shadows and highlights in the picture and add any finishing touches to your portrait. Once you get the effect for shadow and highlight, just knock the opacity down so you place the shadows and highlights in the correct places - then put it back up to 100% obviously.
Step 9
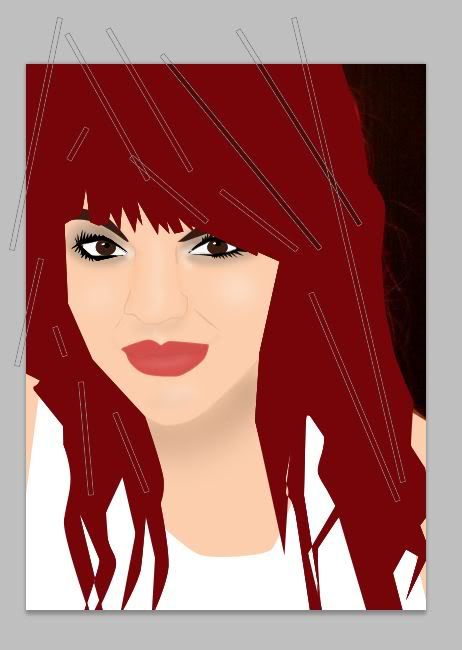
Select the "Hair" layer. Use the shape line tool and add varying sizes of lines to the hair. These will be the highlights. After you have enough, use the smudge tool to simulate soft, wavy hair.
 Step 10
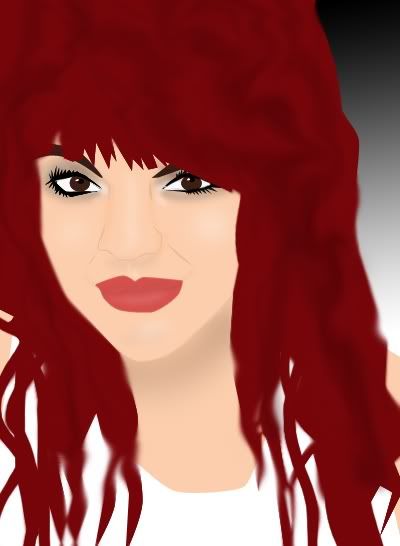
Look over the portrait and ensure there is nothing you want to tinker with. The beauty of vector portraits is that they can be as detailed or simple as you want. This is somewhere in the middle.
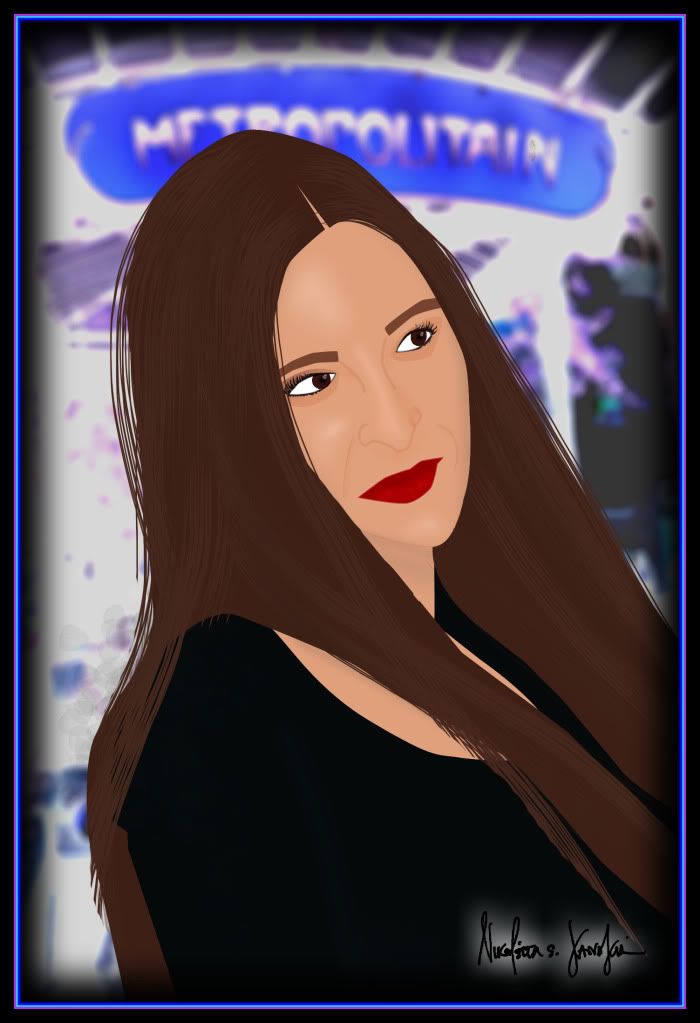
Here is my final vector illustrated portrait of Natasha.
Here is another vector illustrated portrait that I finished today.